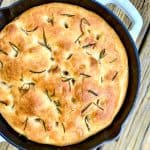
Rosemary-Garlic Focaccia Bread
My No-Knead Rosemary Garlic Focaccia Bread has a crispy crust, is soft and fluffy, and has a lovely rosemary and garlic flavor. Easily doubled, you can make enough focaccia for everyone!
Servings: 12 Servings
Calories: 163kcal
Ingredients
- 1 ¼ cups warm water (110°-120° is best) 300 g
- 1 teaspoon honey
- 1 ⅛ teaspoon active dry yeast
- 6 tablespoon olive oil, divided 82 g, plus more for finishing the bread after baking
- 1 ¼ cups all-purpose flour 162 g
- 1 ¼ cups extra fine-flour 162 g (also known as 00 flour) If you can't find this, just use more all-purpose flour
- 2 ½ teaspoon kosher salt (this will also be divided in the recipe, 2 teaspoon in the dough and ½ teaspoon in the mixture we’ll make for the top of the bread)
- 1 sprig fresh rosemary about 1 ½ teaspoon when chopped
- 2 cloves garlic
- Flaky sea salt for finishing baked focaccia
Instructions
- Place warm water in a large bowl, along with one teaspoon of honey and 2 tbs of olive oil. Add the yeast and stir gently. Allow to sit for 5-10 minutes, or until the surface looks foamy (this is called “proofing” your yeast.)
- Once the yeast is proofed, add flour and 2 teaspoon salt and mix well with a dough whisk, wooden spoon, or rubber spatula until a shaggy loose dough forms and no big flour pockets remain. Cover and allow to sit for 15 minutes.
- After resting the dough, you will fold it to strengthen the gluten and develop an airy crust. Starting at the twelve o’clock 🕛 position, use a slightly wet hand, or a flexible dough scraper, to grab the edge of the dough, pull it toward the center, and over to the other side of the dough. Turn the bowl a quarter turn and do it again, and continue until you’ve done four folds, all the way around the dough. Cover the dough again and allow it to rest for 5 minutes. Repeat the folding technique 2 more times (for a total of three times) 5 minutes apart.
- Transfer your dough to another large bowl that has been coated with 2 tablespoons of your olive oil. Roll the dough in the oil to coat it all over and cover the bowl with a piece of plastic wrap that has been sprayed with a little non-stick spray. Allow the dough to rise for 1-2 hours in a warm spot in your kitchen, or until it has doubled in size.
- Cold kitchen proofing hack: If you have a gas oven, an easy way to do this is to turn your oven on to 350° for exactly one minute. Turn it off and your oven will be a nice warm environment that your dough will love. Electric oven? Turn on your oven light before starting the dough making process and leave it on the whole time the dough is rising. It gives a nice gentle warmth to the oven.
- Overnight proofing option: After mixing the dough as directed and placing it in your oiled bowl, cover the bowl with plastic wrap and place in the refrigerator overnight or up to one full day. Allow to come to room temperature for 30 minutes and then carry on with the rest of the recipe as written.
- Grease the sides and bottom of a 12 inch cast iron pan, or a large, deep cake pan, with 2 tablespoons of the flavored oil. Transfer your dough to the pan. It will be very loose, but that is absolutely normal. This is a wet dough and that's what makes it so soft and fluffy!
- Using your fingertips, gently nudge the dough to fill the pan as much as you can. Don't worry if it doesn't fill the pan completely. Cover again with plastic, set aside on the counter, and allow to rise for 60-90 more minutes, or until the dough fills the dimensions of the pan.
- To make the topping, strip the rosemary from the stems and chop. Using a fine zester, grate the garlic. Add rosemary, grated garlic, and ½ teaspoon kosher salt to 2 tablespoon of olive oil and mix well. Allow to sit while your dough makes its final rise. This will allow the oil to really absorb the flavor of the rosemary and garlic.
- While your dough makes its final rise, preheat your oven to 450° and place the rack in bottom third of the oven.
- Spoon the rosemary garlic olive oil all over the surface of the dough and gently spread around. With your fingertips, press deeply into the top of the dough, almost to the bottom, to make the traditional dents found on the surface of focaccia.
- Bake for 25-28 minutes or until the top is golden brown. Remove from the oven and brush the top with a little more olive oil and sprinkle with flaky sea salt, if desired.
- Run a thin metal spatula along the edges of the pan to loosen the bread and place it on a wire rack to cool.It’s perfect dipped in a little olive oil and balsamic vinegar, sliced in half for a delicious sandwich, or just eaten on its own.
Notes
Nutrition information provided is only an estimate and will vary based on cooking methods and brands of ingredients used.
Nutrition
Calories: 163kcal | Carbohydrates: 21g | Protein: 3g | Fat: 7g | Saturated Fat: 1g | Sodium: 487mg | Potassium: 41mg | Fiber: 1g | Sugar: 1g | Vitamin A: 1IU | Vitamin C: 1mg | Calcium: 6mg | Iron: 1mg